

It is no longer a costly laptop and editing system to make YouTube videos. By 2025, Chromebooks will have become affordable, trustworthy and content creation devices as the ChromeOS has been upgraded, is compatible with Android applications and enables editing on the cloud.
You can record and edit with higher quality and upload your video, be it as a vlog, gamer, or tutorial maker, right now and all on your Chromebook, right through your browser.
This tutorial will guide you through all of that – installation of your device to recording, editing and uploading your first video to YouTube. You will discover all the recent tools, steps, and tips by 2025 to complete your video production workflow efficiently and creatively, even using a lightweight machine.
Why Chromebooks Are a Viable YouTube Studio in 2025
In the olden times, Chromebooks were perceived as being restricted and only good enough to browse or take notes. But in 2025, that’s no longer true.
The ChromeOS of Google now has the capability of Android applications, Linux applications, and sophisticated web tools that make Chromebooks portable and an all-in-one technology for creating content.
Here’s why thousands of YouTubers in 2025 are choosing Chromebooks for their workflow:
- Improved Performance:
The latest Chromebooks use Intel Core i5/i7 or MediaTek Kompanio 1380 processors with 8GB–16GB RAM, making multitasking and video rendering much faster than older models.
- Access to Android & Linux Apps:
You can install Android editing tools like CapCut, PowerDirector, and Adobe Express, or Linux-based editors like Kdenlive and Shotcut. This flexibility means you’re no longer restricted to browser-only tools.
- Cloud-Based Power:
Tools like WeVideo, Canva, and Clipchamp run entirely online, so your Chromebook’s limited local storage isn’t a problem. Everything — from footage to final render — can be stored and processed in the cloud.
- High-Quality Cameras and Mics:
Many Chromebooks now feature 1080p webcams and built-in noise-cancelling microphones, perfect for recording on the go without extra hardware.
- Seamless YouTube Integration:
ChromeOS is built around Google services. You can easily access YouTube Studio, upload videos, design thumbnails on Canva, and manage your channel — all in the same ecosystem.
In short, your Chromebook in 2025 is more than capable of producing YouTube videos that look and sound great. Whether you’re editing travel vlogs, gaming clips, or tutorials, ChromeOS has everything you need in one compact machine.
What You Need to Record on a Chromebook (Hardware & Software)
Before hitting record, make sure your Chromebook setup meets the requirements for smooth video creation. Here’s a complete checklist to help you prepare your mini YouTube studio:
Hardware Essentials (2025 Recommendations)
- Chromebook Model:
- Recommended: Acer Chromebook Spin 714, ASUS Chromebook Plus CX34, or HP Dragonfly Pro Chromebook — all offer Intel i5 or i7 CPUs, 8GB+ RAM, and solid-state drives for faster editing and rendering.
- Minimum: Intel i3 with 8GB RAM and 64GB storage for basic video projects.
- Camera & Microphone:
- Built-in Webcam (1080p) is enough for talking videos, but for higher quality, use a USB webcam like the Logitech StreamCam.
- Pair it with an external mic such as the Blue Snowball or Rode NT-USB Mini for crisp audio.
- Lighting Setup:
- Use a ring light or LED panel light to ensure your videos look bright and professional, especially if you’re filming indoors.
- Storage & Backup:
- Since Chromebooks have limited local space, use Google Drive or an external SSD like the Samsung T7 to store raw footage safely.
Software & App Recommendations (2025 Update)
- Recording Tools:
- Screencast (built-in) – Best for screen tutorials.
- Loom – Ideal for webcam + screen recording.
- Clipchamp Recorder – Great for vlogs and quick edits.
- Editing Tools:
- CapCut for Web/Android – Simple and powerful with AI captioning.
- WeVideo – Cloud-based editing with YouTube export.
- LumaFusion (for select Chromebooks) – Professional-grade editing app.
- Thumbnail & Graphic Tools:
- Canva or Pixlr – Design stunning thumbnails directly on ChromeOS.
- YouTube Tools:
- YouTube Studio for uploads, analytics, and channel management.
- TubeBuddy or VidIQ extensions for optimising titles and tags.
Once your Chromebook setup and tools are ready, you’re all set to move to the next stage — recording your video efficiently.
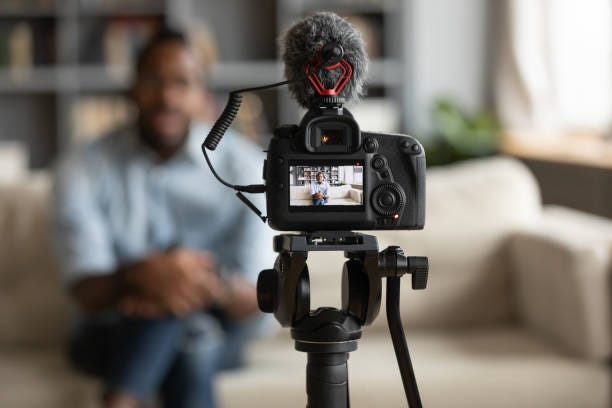
Step-by-Step: How to Record High-Quality Video on a Chromebook
In 2025, it is actually very easy to create a video on YouTube on your Chromebook as long as you have the appropriate setup. The following is a guide to follow one step at a time in order to capture smooth, clear, and engaging content, either in the form of a vlog, gaming video, or tutorial.
Step 1: Plan Your Video Concept
Before you hit record, decide what your video is about. Write a short script or outline your talking points. Good planning ensures you speak clearly, stay organised, and keep viewers watching till the end.
Step 2: Set Up Your Workspace
Choose a well-lit, quiet spot. Sit near a window or use a ring light for even lighting. Ensure your background looks clean — clutter distracts your audience.
Step 3: Adjust Camera & Microphone Settings
- Open your Chromebook camera app and set 1080p recording resolution.
- If using an external webcam or mic, check permissions under Settings → Privacy → Camera/Microphone.
- Test your audio levels — clear sound matters more than perfect video.
Step 4: Use the Built-in Screencast App (or Loom)
Chromebooks now include a built-in Screencast app (updated in 2025) that allows you to record your screen, webcam, and voice simultaneously.
- Press Ctrl + Shift + Show Windows (⊞) to open the recording menu.
- Choose whether to record the entire screen, window, or region.
- Select the Microphone On to capture your voice.
- For tutorials or presentations, Loom is another excellent web app that automatically uploads recordings to the cloud.
Step 5: Capture B-Roll or Additional Clips
Use your phone or a second device to film extra angles, reactions, or location shots. You can later transfer these clips to your Chromebook via Google Drive or USB.
Step 6: Save and Review Your Recording
After recording, check your video in Files → Downloads → Screencast Recordings. Watch it to ensure visuals and sound sync perfectly. If something looks off, re-record short sections instead of the entire video.
Best Video Editors for Chromebook in 2025
Editing is where your raw clips come to life, and in 2025, Chromebooks offer a variety of powerful editing tools that run smoothly even on mid-range devices. Here are the best options depending on your workflow:
1. CapCut (Web & Android)
CapCut remains the most popular free editor in 2025. It offers drag-and-drop editing, AI captioning, filters, and transitions that run directly in your browser. It’s perfect for beginners and short-form YouTube content.
2. WeVideo (Web App)
WeVideo is a professional cloud-based editor that stores your footage online. It includes green-screen effects, motion titles, and a YouTube export feature — ideal for creators who want to edit without using local storage.
3. LumaFusion (Android & ChromeOS)
Available on select premium Chromebooks like the HP Dragonfly Pro, LumaFusion is a professional-grade editor with multi-track timelines, advanced colour correction, and cinematic effects.
4. Clipchamp (Web)
Owned by Microsoft, Clipchamp integrates easily with Google Drive and ChromeOS. It’s known for its easy timeline and text overlay tools — perfect for commentary or explainer videos.
5. Kdenlive (Linux App)
If your Chromebook supports Linux, Kdenlive is an open-source video editor that rivals desktop apps like DaVinci Resolve. It’s best for advanced users who want full control over rendering and effects.
Pro Tip: Always edit using a wired charger to prevent throttling during rendering, and close other browser tabs to maximise Chromebook performance.
Fast Editing Workflow: From Raw Clips to Publish-Ready Video
Editing efficiently on a Chromebook requires balance — use cloud tools but stay organised locally. Here’s how to turn your raw clips into a polished YouTube video:
Step 1: Import and Organise Footage
Create folders on Google Drive or your local Files app labelled Intro, Main, Outro, and B-roll. This structure helps you move faster during editing.
Step 2: Trim and Arrange Clips
Start with a hook (first 10 seconds) — something that grabs attention. Then arrange your clips in a logical flow. Use jump cuts to remove pauses and keep your pacing fast and engaging.
Step 3: Add Titles, Music, and Transitions
- Add your intro text or logo using CapCut or WeVideo’s text tools.
- Use royalty-free background music from YouTube’s Audio Library.
- Keep transitions simple — fade-ins and fade-outs maintain professionalism.
Step 4: Adjust Audio Levels
Ensure your voice remains clear and consistent. Use built-in noise reduction tools in your editor, and keep background music volume below 20%.
Step 5: Export Settings for YouTube (2025 Standard)
- Resolution: 1080p (1920×1080)
- Frame Rate: 30–60fps, depending on your recording
- Bitrate: 8–12 Mbps for 1080p
- Format: MP4 (H.264 codec)
Export your final video and save it to Google Drive or Downloads for easy access during upload.
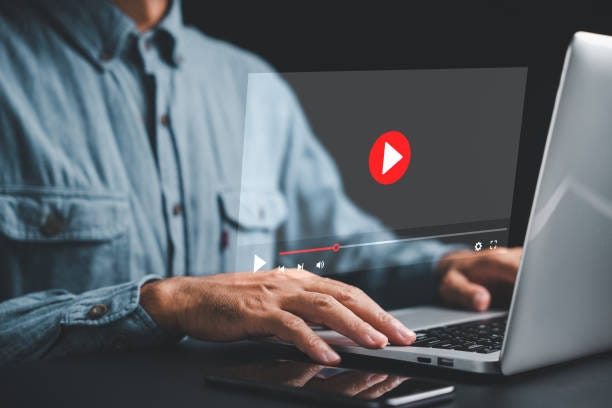
Upload, Optimise and Publish: YouTube Settings, Thumbnails & SEO
Once your video is ready, uploading from a Chromebook is straightforward. Open YouTube Studio in your browser and follow these optimisation tips to stand out in 2025’s competitive creator world.
Step 1: Upload & Add Details
- Click Create → Upload Video in YouTube Studio.
- Select your exported file from Downloads or Google Drive.
- Fill out your title, description, and tags with target keywords (e.g., “How to make a YouTube video on a Chromebook 2025”).
Step 2: Design a High-Click Thumbnail
Use Canva or Pixlr to create a 1280×720 thumbnail. Add a bright background, your face, and bold text. Thumbnails are your video’s first impression — keep them simple but catchy.
Step 3: Add End Screens & Cards
Use YouTube Studio’s editor to add end screens, cards, and subtitles. These increase viewer engagement and help your video rank higher in watch time metrics.
Step 4: Optimise SEO for 2025
- Include your main keyword in the first 100 characters of your description.
- Add timestamps for sections (e.g., “0:00 Intro, 0:45 Recording setup, 2:30 Editing”).
- Use tags related to Chromebook, ChromeOS, and YouTube tutorials.
Step 5: Publish & Promote
Share your video link across Reddit, Twitter (X), and Facebook groups related to Chromebook or YouTube tips. Consistency is key — aim for 1–2 uploads per week to build algorithm trust.
FAQs
Can you create YouTube videos on a Chromebook?
Yes, you can easily create YouTube videos on a Chromebook using tools like CapCut, WeVideo, or the built-in Screencast app to record, edit, and upload directly to YouTube.
What does Ctrl+Alt+Z do on a Chromebook?
Pressing Ctrl + Alt + Z on a Chromebook turns ChromeVox (the screen reader) on or off, helping users with visual impairments navigate the system.
How to record a YouTube video on a Chromebook?
Use the Screencast app or Loom extension to record your screen, webcam, and audio, then save or upload your video directly to YouTube via Chrome browser.
What cannot be done on a Chromebook?
Chromebooks can’t run heavy desktop software like Adobe Premiere Pro or offline games that require Windows or macOS, but cloud and Android alternatives cover most tasks.